


Getting Started with Hasura Cloud
Table of contents
Introduction
This guide talks about setting up Hasura Cloud with a new or existing Postgres database.
Step 1: Create an account
Navigate to cloud.hasura.io, and create a new Hasura Cloud account.
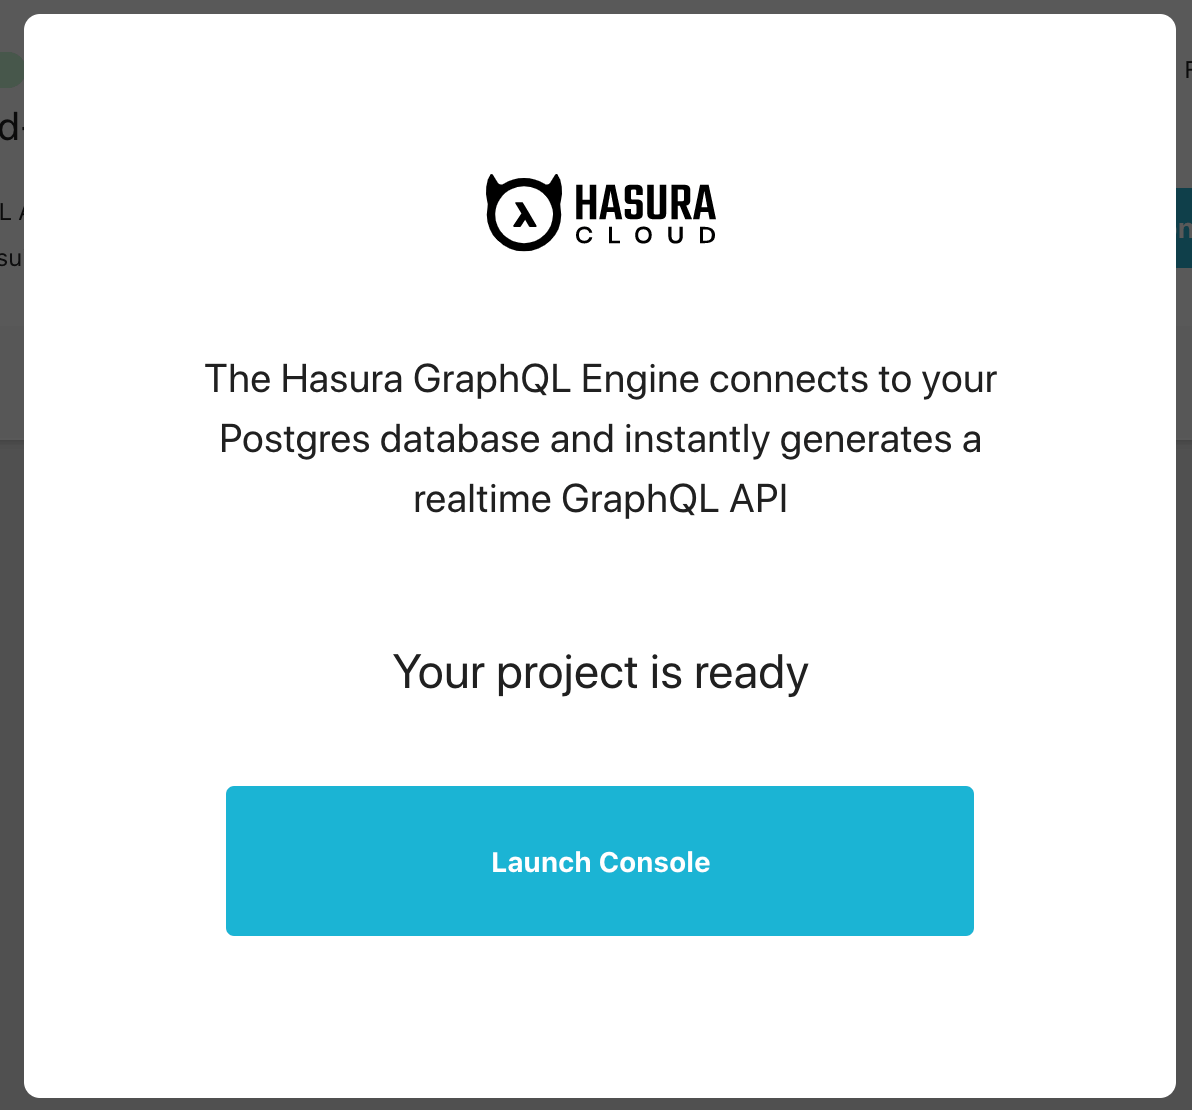
Step 2: Create project
Hasura Cloud creates an initial project. Click Launch Console to open the Hasura console in your browser.
Step 3: Connect new/existing database
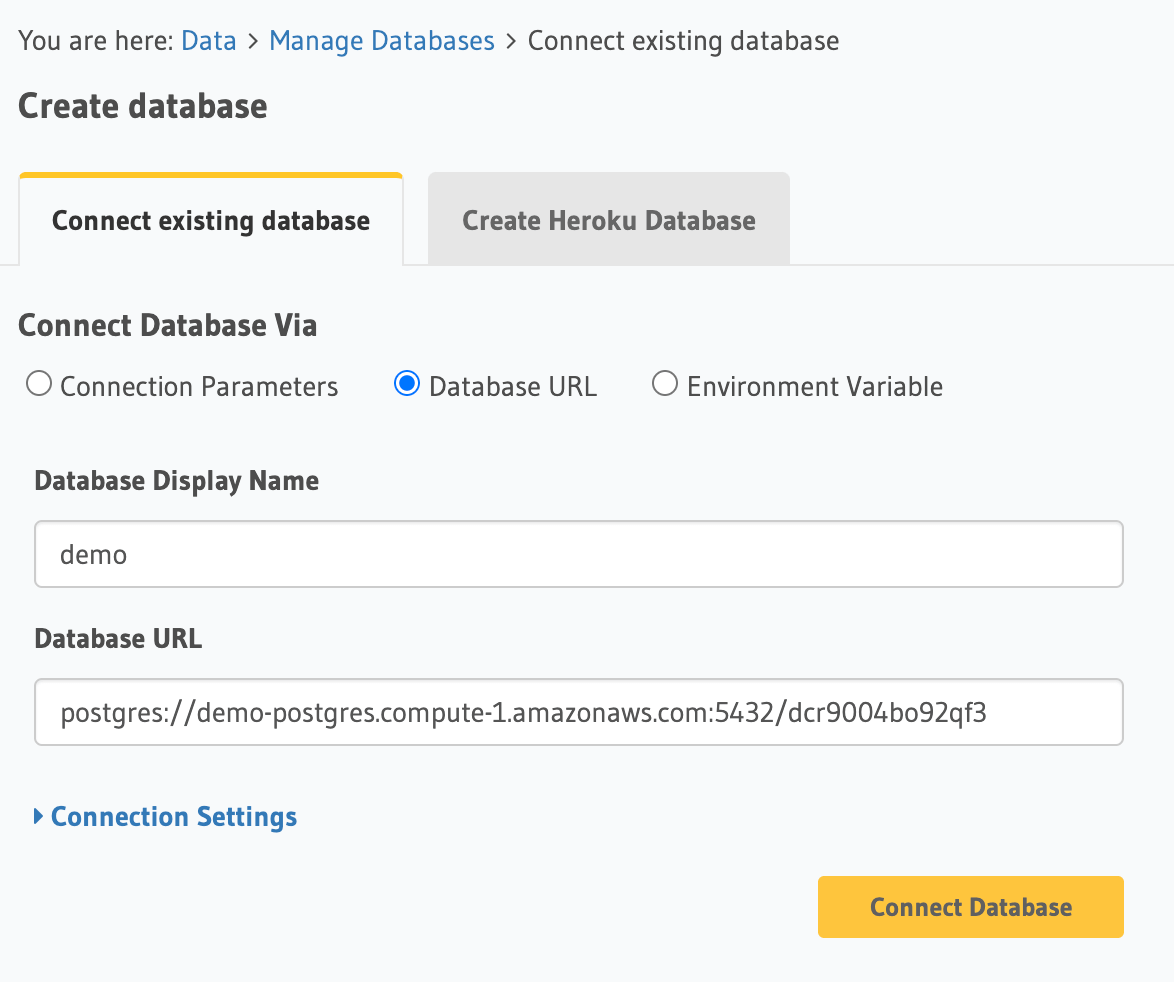
On the Hasura console, navigate to Data -> Manage -> Connect Database:

- To use an existing database, choose
Connect existing database. - To try out with a new database, choose
Create Heroku Database.
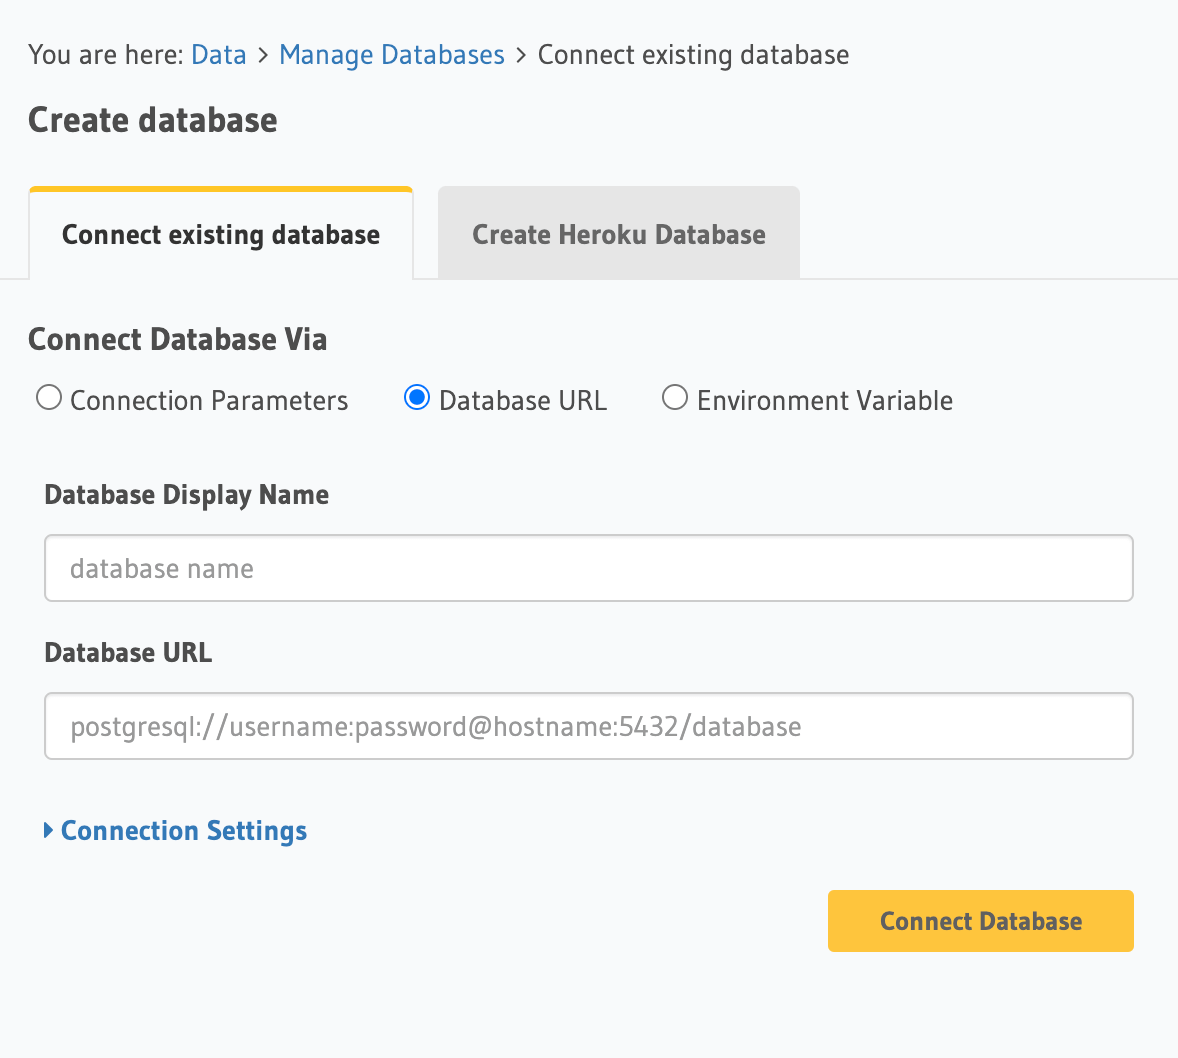
Step 3.1: Enter database connection URL (for existing database)
If you chose Connect existing database, enter your database connection URL.
Click Connect Database.
If your database is hosted via any of the following managed cloud database services, check out their respective detailed guides to get the database connection URL and any other steps required to ensure connectivity from Hasura Cloud:
Step 4: Try out Hasura
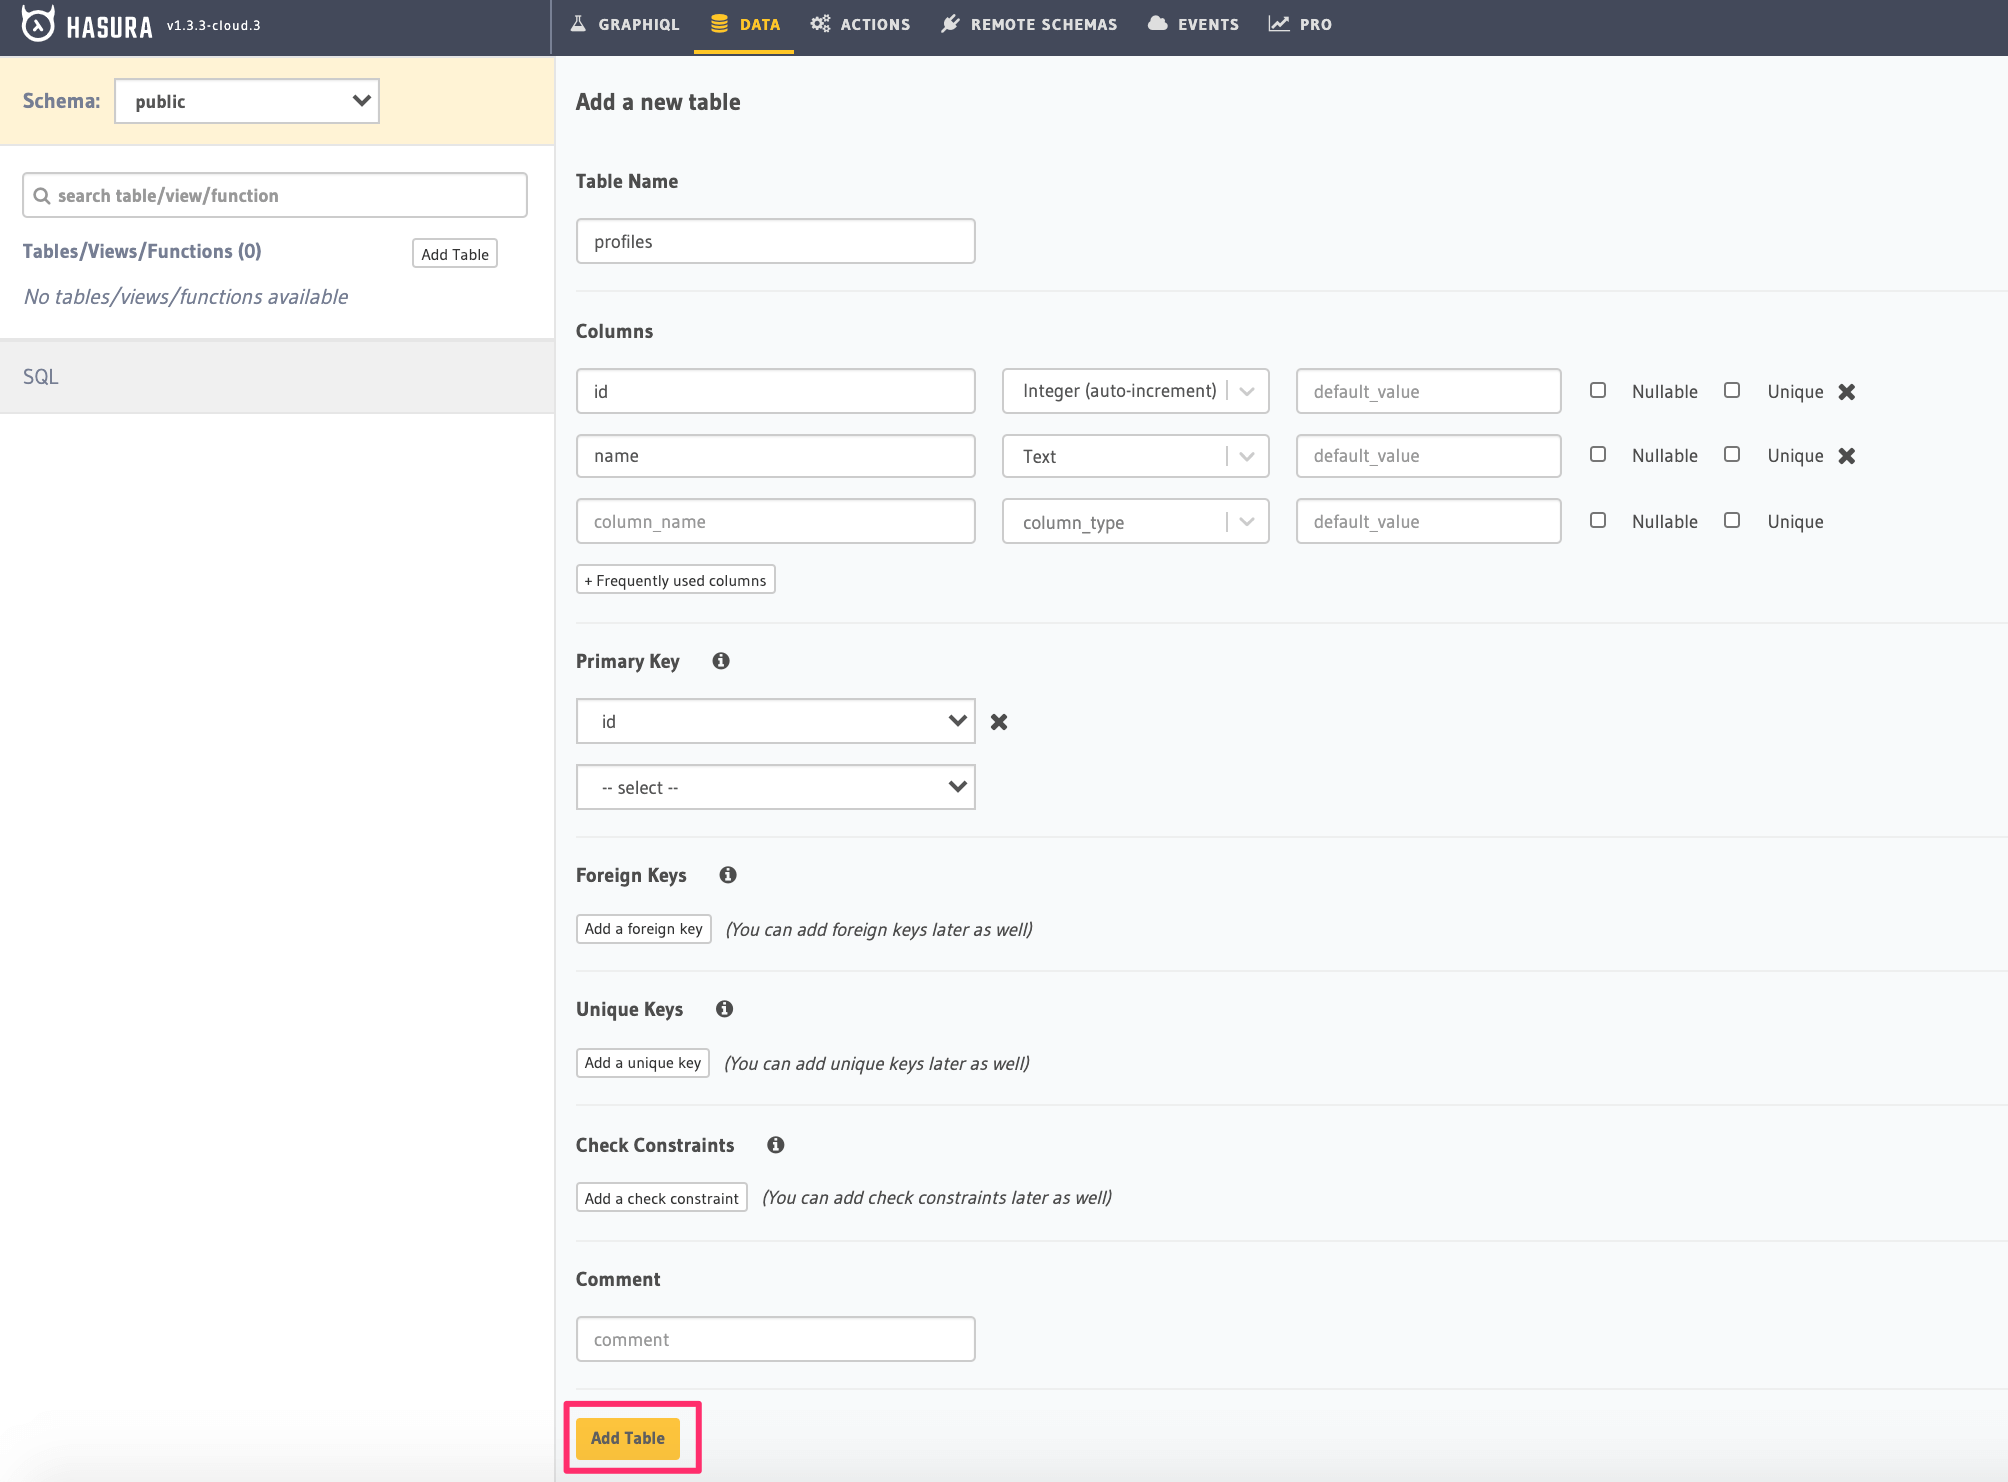
Create a table
On the Hasura console, navigate to Data -> Create table and create a sample table called profiles with
the following columns:
profiles (
  id SERIAL PRIMARY KEY, -- serial -> auto-incrementing integer
  name TEXT
)
Now, insert some sample data into the table using the Insert Row tab of the profiles table.
Try out a query
Head to the GraphiQL tab in the console and try running the following query:
query {
  profiles {
    id
    name
  }
}
You’ll see that you get all the inserted data!

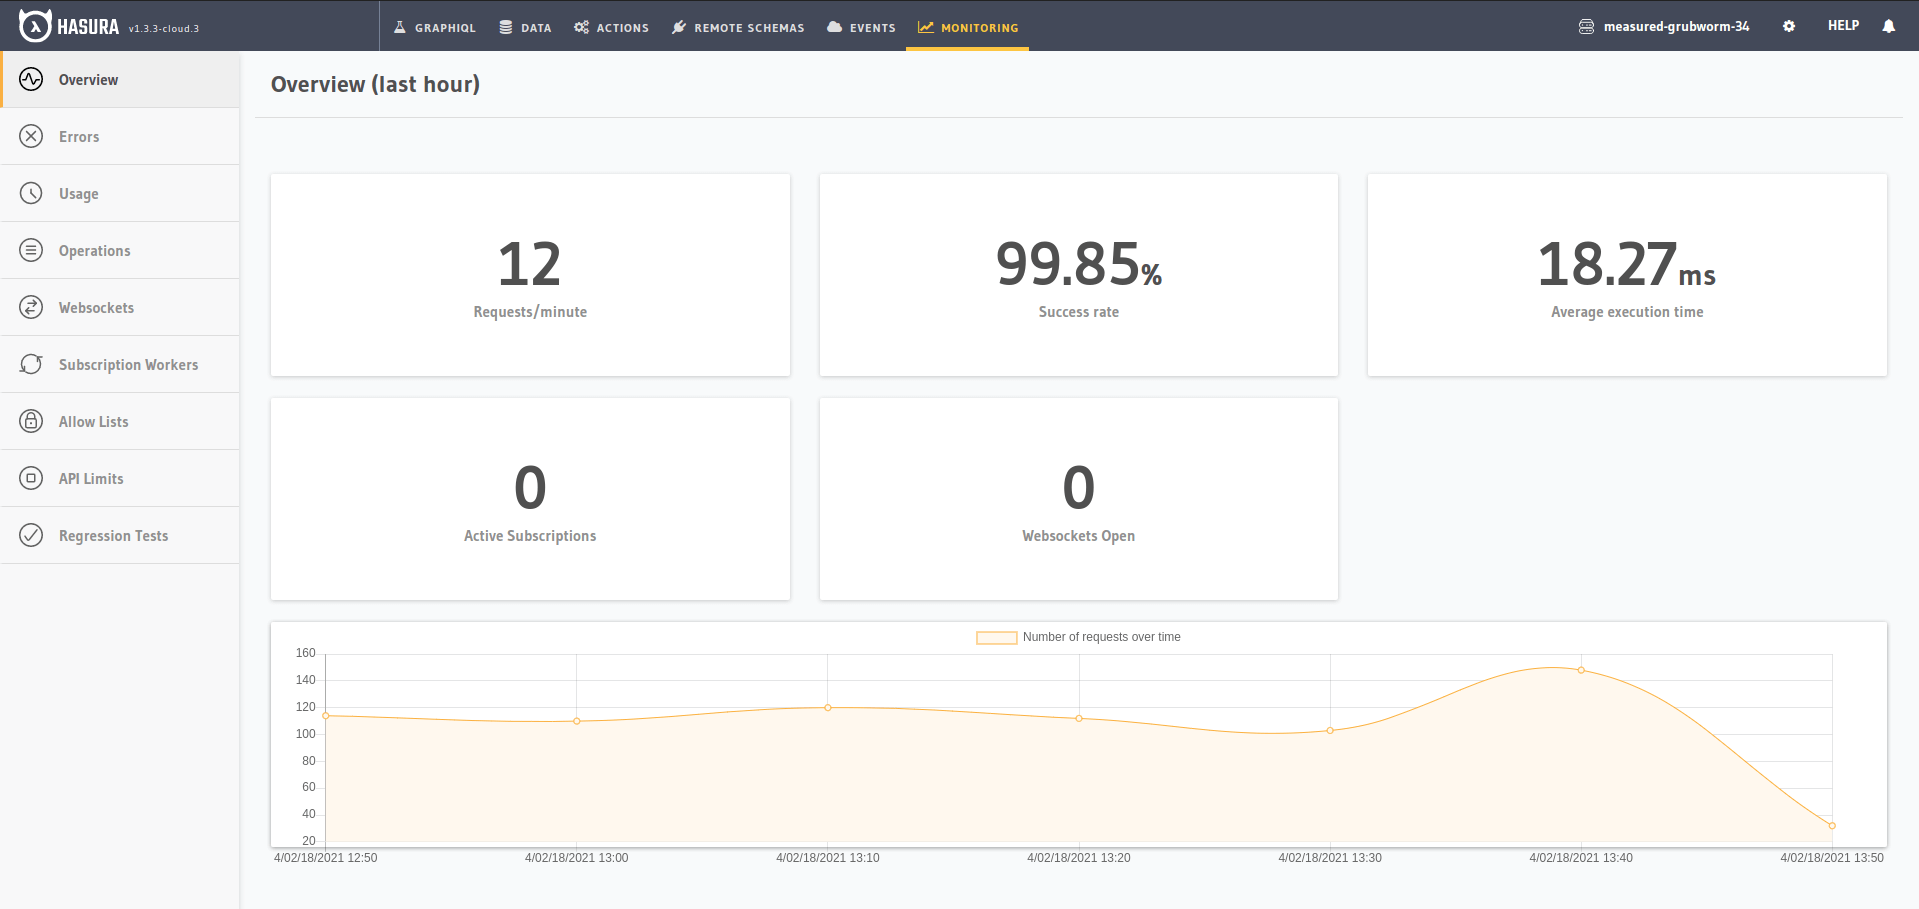
Check out monitoring
You can navigate to the Monitoring tab in the console to check out the Pro features that Hasura Cloud has set up for you.
Next steps
Learn course
For a full hands-on tour of Hasura, check out our 30-Minute Hasura Basics Course.
Database operations
- Database modelling: Learn how to model your database schema, as well as how to extend it.
- Querying data: Use GraphQL queries to query data from your GraphQL API.
- Inserting data: Use GraphQL mutations to insert data into your GraphQL API.
Business logic
There are several options for the implementation of business logic, depending on your use case.
- Actions: Actions can be used if you’d like to extend your GraphQL schema by integrating with a REST endpoint.
- Remote schemas: If you have an existing GraphQL server or if you’re comfortable with implementing one, you can use remote schemas.
- Event triggers: To trigger a serverless function based on a database event, use event triggers.
- Scheduled triggers: Scheduled triggers are used to execute custom business logic at specific points in time.
Secure your endpoint
Add an admin secret to make sure that your GraphQL endpoint and the Hasura console are not publicly accessible.
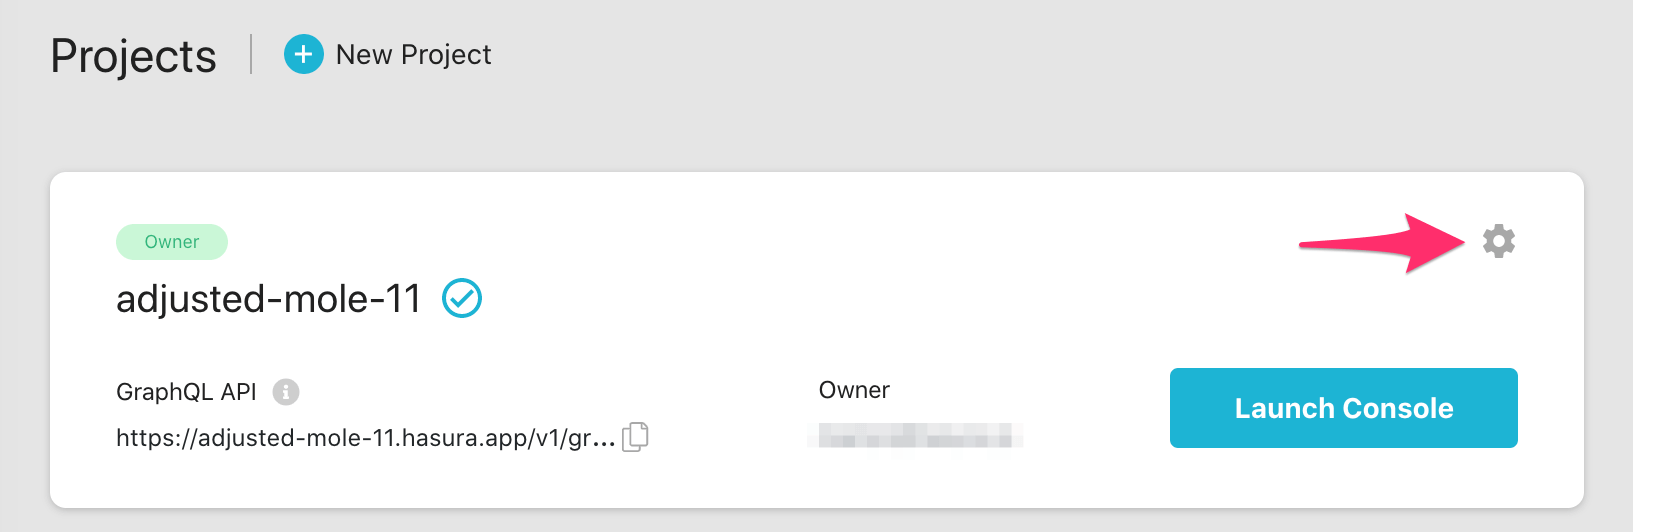
Manage Hasura Cloud project
You can click the gear icon in the Hasura Cloud dashboard to manage your Hasura Cloud project (e.g. add collaborators, env vars or custom domains).
 Thank you for subscribing to our newsletter!